Lets get started.
This will be the final part of the series but also the most complicated, be sure everything works in the previous 3 Parts and follow part 4 you will have a working website just like this one.
Be sure your domain is registered and pointing to the correct name servers in Cloudflare.
Installing WordPress with docker compose in Portainer.
- Log in to your Portainer page and go to stacks and past the following code into the Webeditor.
correct the lines with the 3 Asterix * “Your Data Base user name , Database password and the database name i always use the name of my site like hotstuff_” use the underscore to mark it is a database.
When everything is correct check it again and write down your Login, Password and database name one a piece of paper so you can not forget.
Give your stack a name and Deploy it.
You can find more Information on the WordPress code Here.
version: '3.1'

services:

  wordpress:
    image: wordpress
    restart: always
    ports:
      - 8080:80
    environment:
      WORDPRESS_DB_HOST: db
      WORDPRESS_DB_USER: choose your database user name ***
      WORDPRESS_DB_PASSWORD: choose your password ***
      WORDPRESS_DB_NAME: the Database name_   ***
    volumes:
      - /var/lib/docker/volumes/wordpress:/var/www/html
    links:
      - db:db

  db:
    image: mysql:5.7
    restart: always
    environment:
      MYSQL_DATABASE: the Database name_ ***
      MYSQL_USER: your database user name  ***
      MYSQL_PASSWORD: your password ***
      MYSQL_RANDOM_ROOT_PASSWORD: '1'
    volumes:
      - /var/lib/docker/volumes/db:/mysql

volumes:
  wordpress: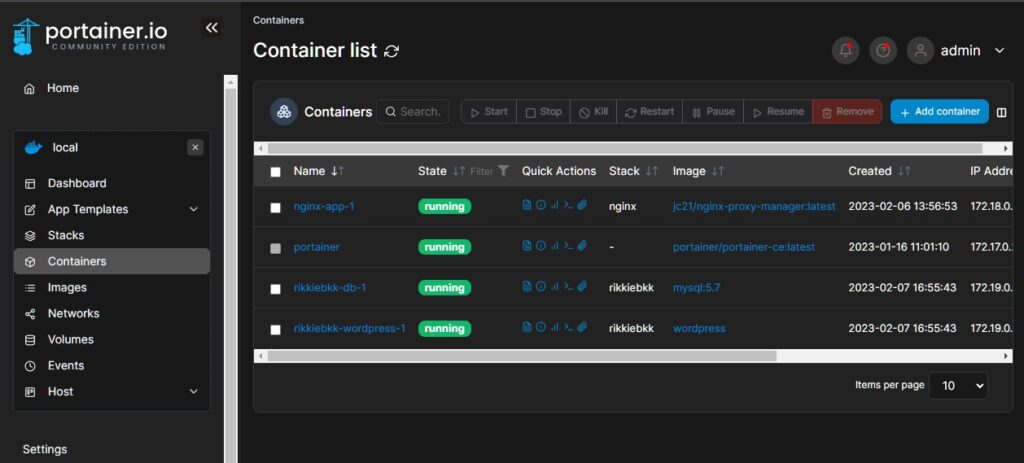
db:- Your container window in Portainer should look like this.
- To Test it open a new browser window type “192.168…..your-IP:8080you should see the following screen it means you are on the right way.
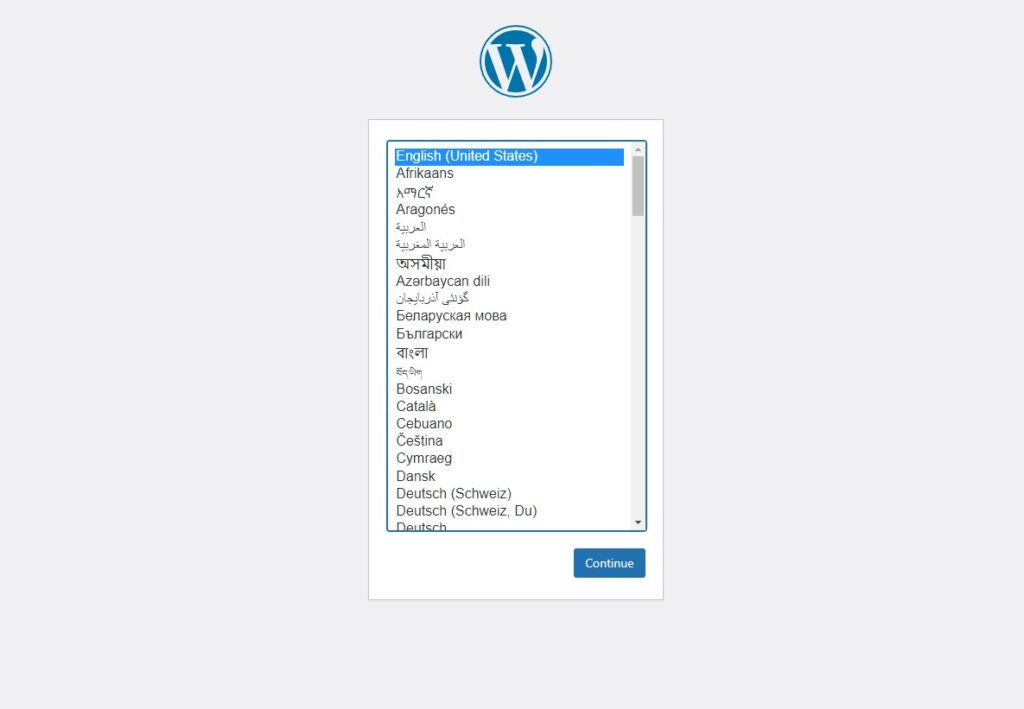
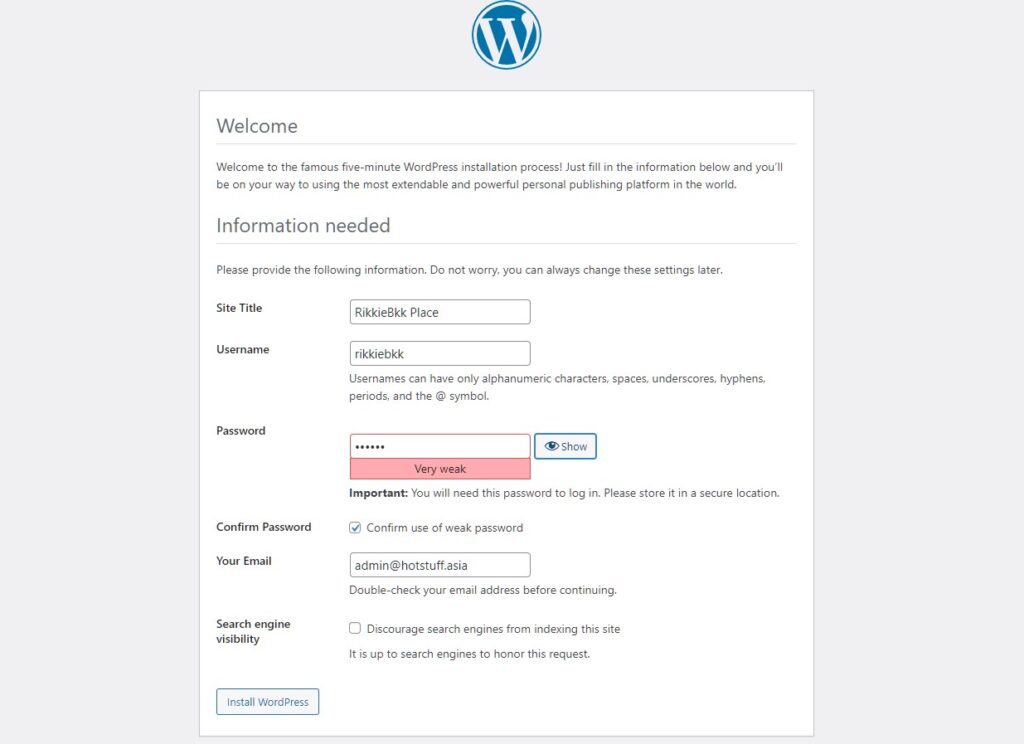
- Choose the language you want for your WordPress en press Continue. Fill in the information needed and click Install WordPress.
- Thats the WordPress part don’t log in for the moment there are still some things we have to setup in Cloudflare and Nginx.
The cloudflare and Nginx settings.
- Login to your cloudflare acoount you made in Part 2 and select your active domainname and goto DNS Records google “what’s my ip” an edit the A Record and change the public IP address dont forget to fill in also your domain name. Save it and we are done here.
- Be sure to set port forwarding in your Router for port 80 and 443.
- Open a new Browser window and type in “your Local IP:81” this will open Nginx and login.
- Select proxy Host and “Add Proxy Host” complete the form like below with your info.
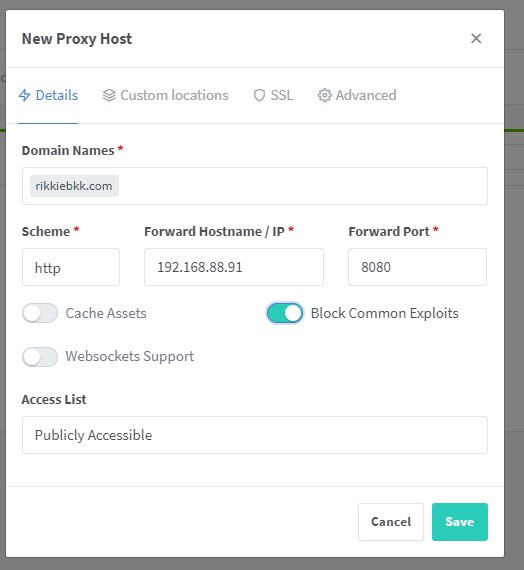
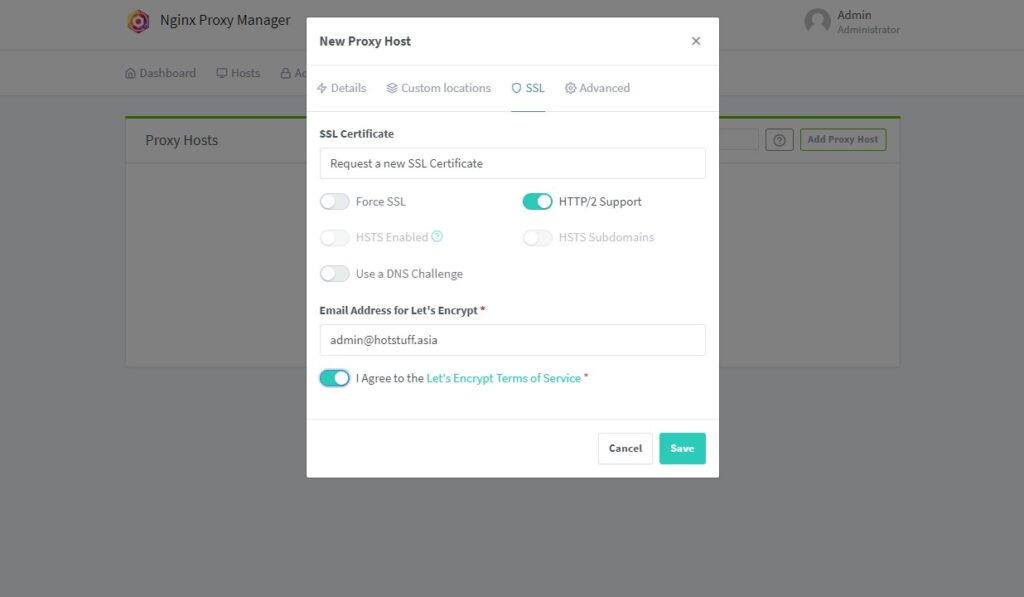
- Then go to click the Tab SLL select Request a new SSL Certificate complete the rest of the form and click Save.
That’s it you have now your own hosted WordPress site
Type in your domain name in the browser and you should see your site.
And don’t forget my coffee

if you have any questions just send email to RikkieBkk
 2890
2890