Where we left of in Part 2
We installed Cloudflare see Here so when our IP address changes, Cloudflare will detect this and point it to the new one also it will give us a extra layer of security.
In this Part we are going to install NGINX reverse Proxyserver so we can tell Cloudflare where to find our website on our home network and also provide a Free SSL certificate with Let’s Encrypt so we will secure our site with HTTPS:// your domain_Name.
Lets get started.
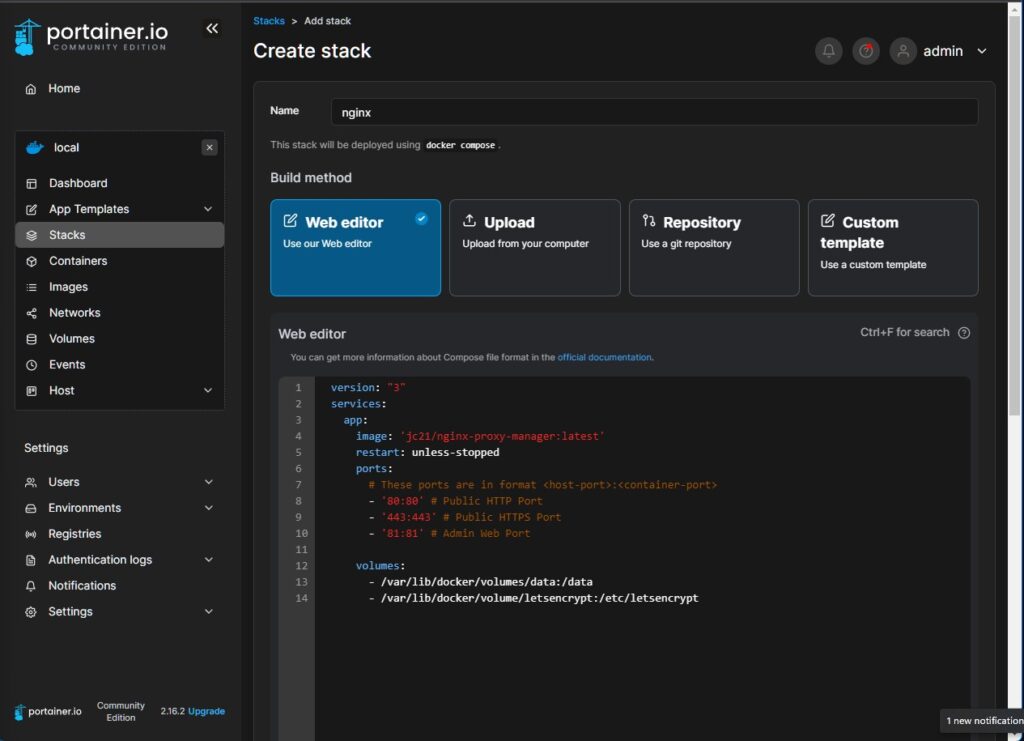
- Lets open Portainer and go to stacks, you can find the docker compose code on the NGINX website but i redacted it already so you save some work see below.
version: "3"
services:
  app:
    image: 'jc21/nginx-proxy-manager:latest'
    restart: unless-stopped
    ports:
      # These ports are in format <host-port>:<container-port>
      - '80:80' # Public HTTP Port
      - '443:443' # Public HTTPS Port
      - '81:81' # Admin Web Port

    volumes:
      - /var/lib/docker/volumes/data:/data
- /var/lib/docker/volumes/letsencrypt:/etc/letsencrypt- Copy and past the code in to the Web editor in the Stacks window and give it a name “nginx” and press Deploy at the bottom.

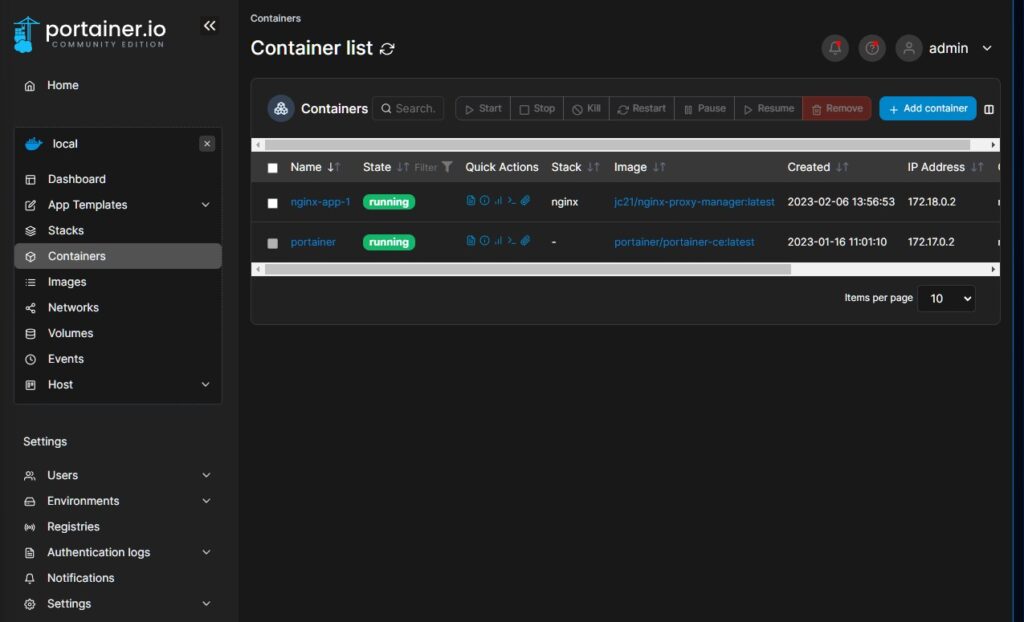
- After you sucsesfully deployed the stack click on Containers in the left menu and you should see the application running.

- you can close portainer now and open a new tab in your web-browser and type http:// your local ip:80 you will open the Congratulations! window so you are sure everything is working. Yeah
Now go to the address Http:// your local ip:81 and you will see the login screen from NGINX logi with Email address : [email protected] Password: changeme - Fill in your name nickname and email and click save.

- In the next window change your password to something strong and save it.
That’s it
In the next part we will install WordPress and put all the pieces together.
Check back regularly for PART 4 where we will install WordPress in our Proxmox Lxc Docker container with Portainer.
And don’t forget my coffee

if you have any questions just send email to RikkieBkk
 4578
4578


