
What you Need.
- A pc with Proxmox VM installed
- A USB stick with nothing impotant on it because you will loose it all!!!
- Write the latest ARPl Image on the USB stick with Balenaetcher or rufus
- this tutorial also presume you know how to us arpl on a barebone system.
Lets get started.
- Login to your proxmox Node and click Create VM
- Fill in the VM ID and a name for your VM i used dsm7.0 >>>> Next

- In the OS select do not use any media >>>> Next
- Sytem you can skip its ok >>>> next
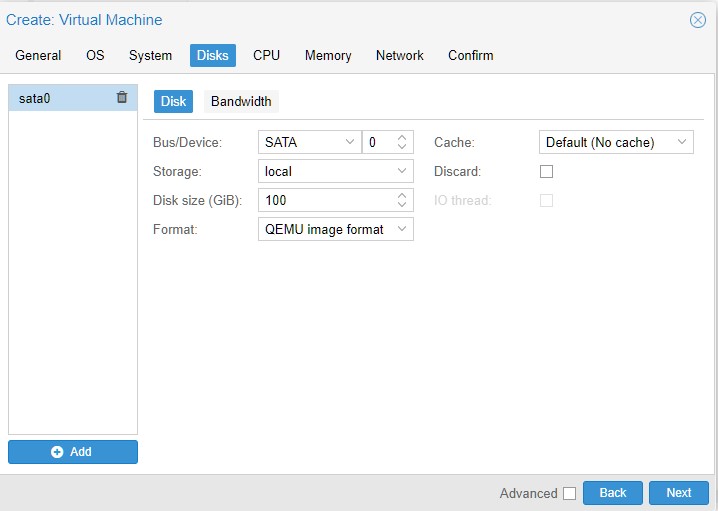
- Disk will be your NAS storage disk you can make it as big if you want but be sure it is SATA >>>> Next
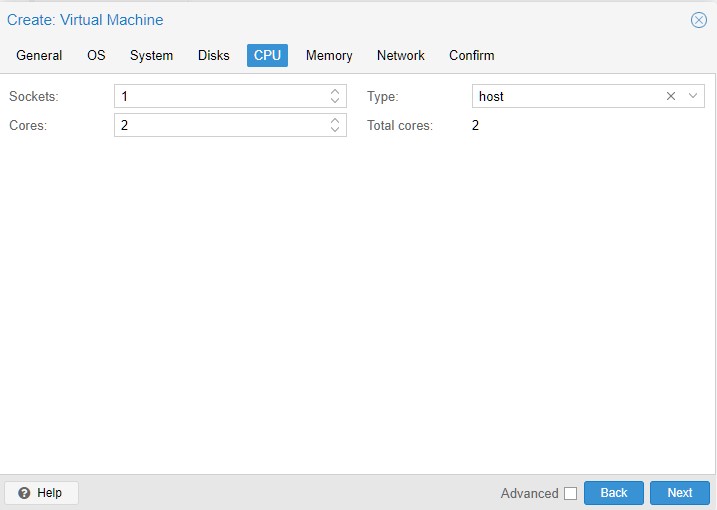
- cpu you can give it what you want depending your machines hardware also in Type choose Host so it will try to resemble the host machine. >>>> Next
- Memory use as much as you want but a minimum of 4096 Gig >>>> Next
- In Network just change the model to Intel E1000
- Next check your configuration and finish be sure that start after creation is NOT checked
- Now it is time to put the USB stick in a Usb port on your Proxmox machine.
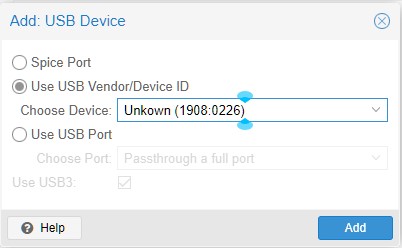
- Now click on Hardware and Add USB Device >>>> Add
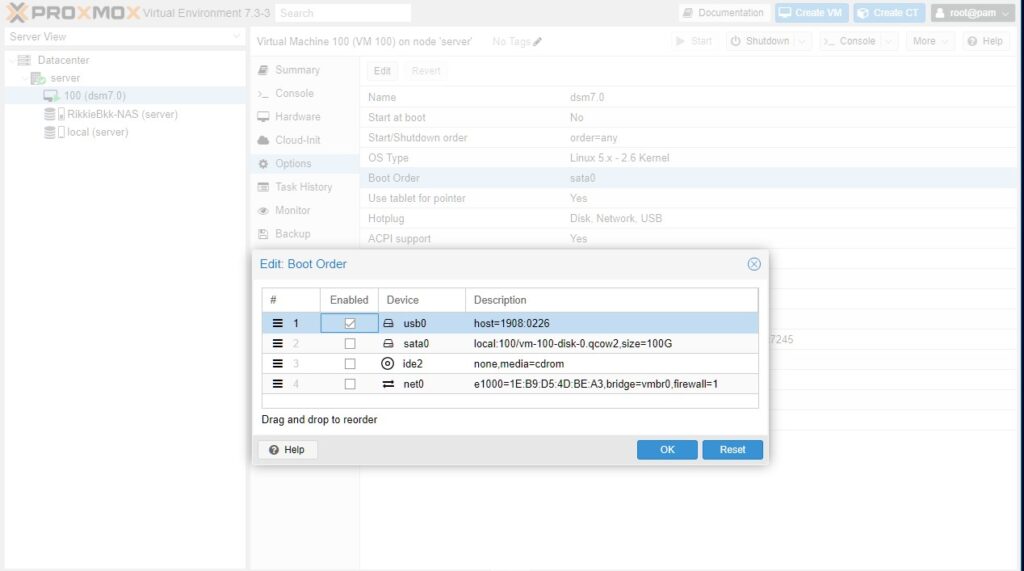
- Now go to Option and change the Boot order so that the USB is first like below >>>> OK
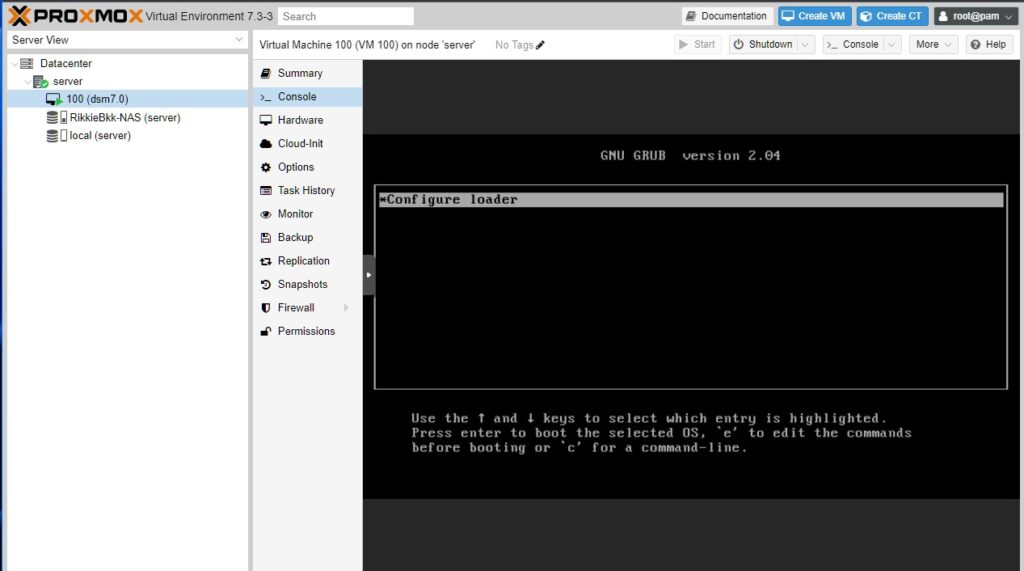
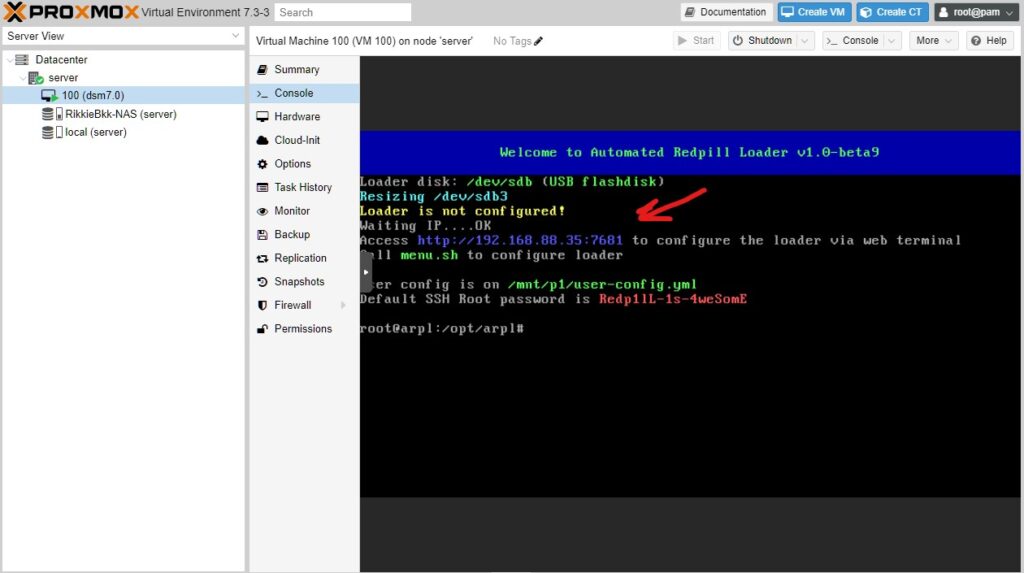
- Now open console and click start you should see this after some time:
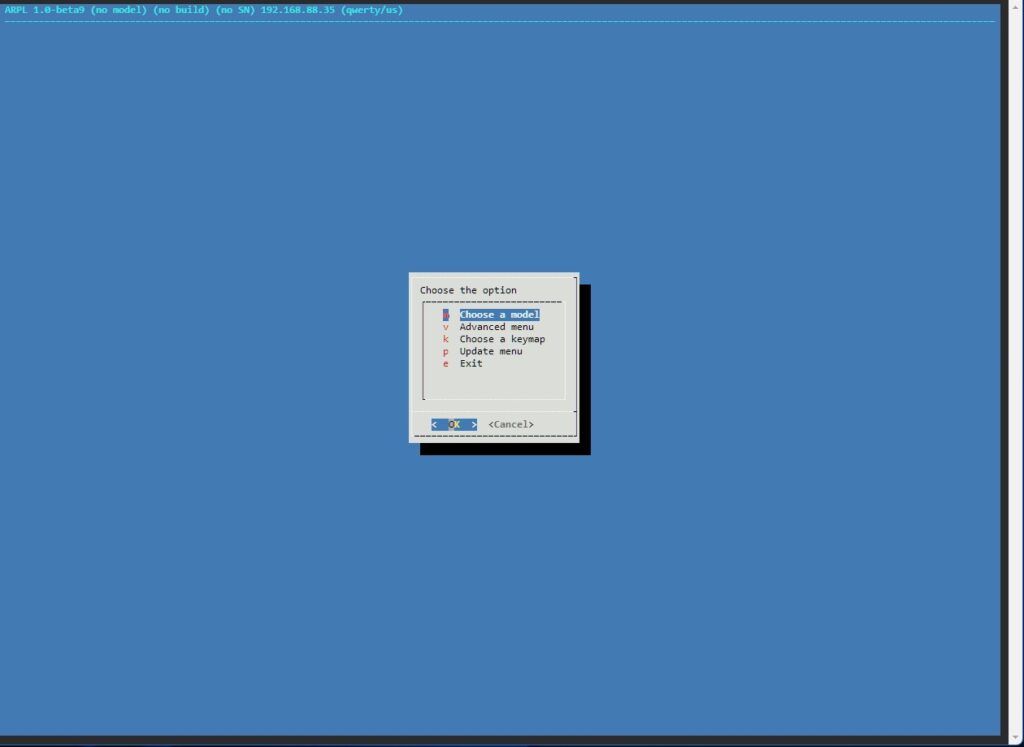
- Then open a new browsing window and go to the Ip address and port that is mentioned in the Bootscreen of ARPL you are now ready to install xpenology.
Thats it
This is the easy why to install the new popular ARPL loader on your Proxmox server you will see it runs even smoother then on bearbone install.
Keep looking out for the install without a USB.
 61000
61000